When applying for a photo edit for visa, one of the most important yet overlooked requirements is the visa photo. A clear, well edited photo can make the difference between a smooth application process and a frustrating rejection. Many people do not realize that their photo may not meet specific guidelines, which can lead to delays or even denials.
In this article, well explore how to properly edit your visa photo to meet all the required specifications. Whether you are applying for a US visa, UK visa, or any other international travel document, knowing the right way to adjust your photo for size, resolution, background, and other essential factors is crucial.
Well walk you through easy steps to take the perfect photo and edit it using simple online tools, saving you time and avoiding mistakes. So, lets dive into how photo editing can help ensure your visa application process goes as smoothly as possible.
What Is Photo Edit For Visa?
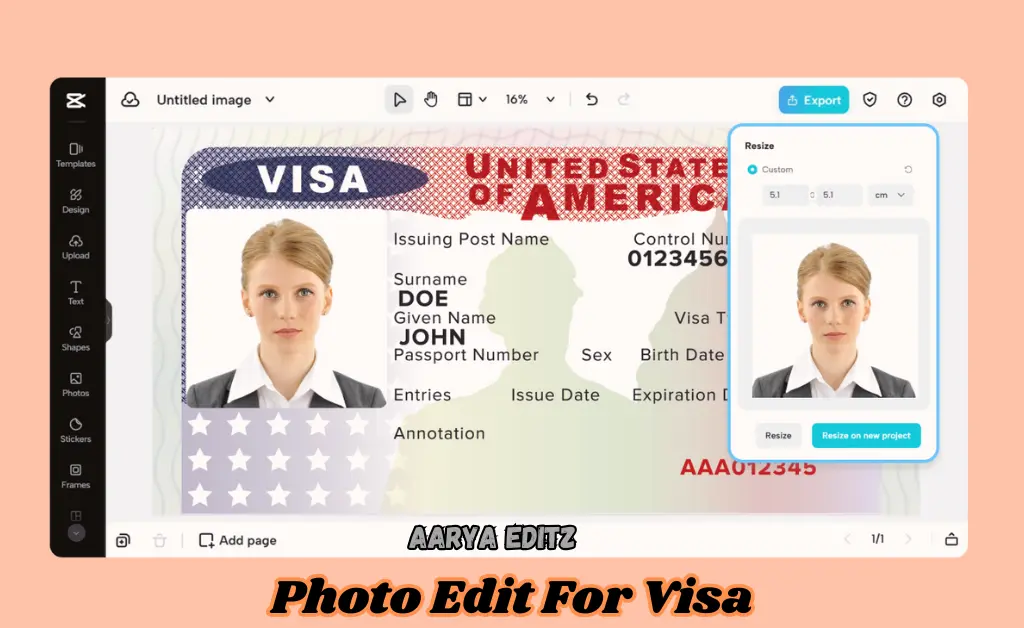
Photo edit for visa means making sure your photo meets the specific rules for visa applications. Every country has its own set of rules about how the photo should look. These rules might include things like the photo size, the background color, how your face should appear, and whether you can wear glasses or a hat.
For example, your face should be clearly visible, and the background should be plain white or off white. The photo should also be the right size (like 2 inches by 2 inches) and high quality so it does not look blurry.
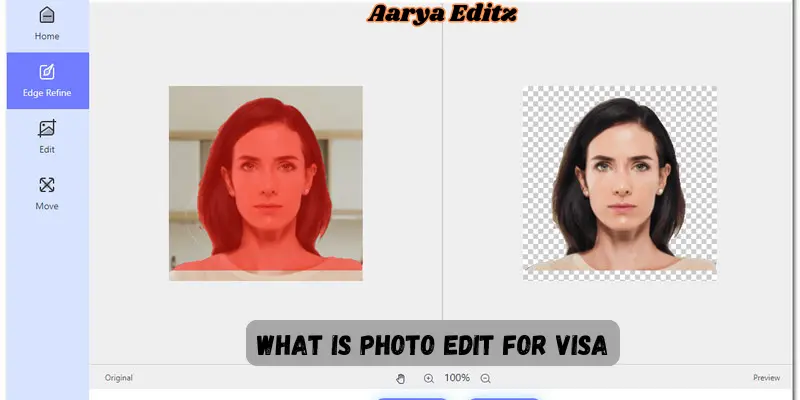
Sometimes, people need to edit their photos to meet these rules, such as cropping the image to the right size, removing any shadows, or making the background plain white.
In simple terms, “photo edit for visa” is the process of adjusting your photo so it follows the official requirements, making sure it gets approved for your visa application. This helps avoid mistakes that could delay your trip.
You May Also Visit
AR Photo Editing | Complete Guide | Aarya Editz
Snapseed Background Image | Aarya Editz
Snapseed Picsart CB Background HD | Aarya Editz
Online Photo Editor Picsart | Aarya Editz
Why is “Photo Edit for Visa” Important?
When you apply for a visa, your photo is a crucial part of the process. It is not just any photo—there are specific rules you need to follow to ensure it meets the standards. Here is why editing your photo correctly is so important:
1. Avoid Rejection of Your Application
- Meets Official Requirements: Each country has strict guidelines for visa photos. If your photo does not follow these rules, your visa could be delayed or even rejected. For example, the photo must be the right size, have a neutral background, and show your face clearly.
- Saves Time: If your photo is rejected, you will have to resubmit it, which can delay your entire visa process. Properly editing your photo helps avoid unnecessary delays.
2. Ensures Proper Identification
- Clear and Identifiable: A correctly edited photo ensures that your face is clearly visible, which helps authorities identify you easily. This is important for security and to make sure your visa matches your real appearance.
- Correct Proportions: The size and positioning of your face in the photo must meet certain requirements. Editing ensures your head and eyes are in the right position, making the photo suitable for identification.
3. Improves Professional Appearance
- No Distractions: Editing your photo ensures that there are no distracting elements like shadows, glare, or background clutter. A clean, well lit photo looks more professional and helps create a good impression.
- Consistent Image Quality: Ensuring your photo has the right resolution and quality makes sure that it prints clearly and professionally. A blurry or pixelated image could be rejected.
4. Increases Chances of Visa Approval
- Meets International Standards: Many countries require visa photos to be uniform in size, background color, and quality. Proper photo editing ensures that your image adheres to these standards, improving your chances of quick approval.
- Fits Online Submission Requirements: Many visa applications allow you to submit photos online. Editing your photo to meet the digital requirements (such as file size, format, and resolution) ensures it can be uploaded smoothly.
By following these steps and ensuring your visa photo is correctly edited, you make your application process easier and faster. This way, you will avoid unnecessary problems and increase your chances of getting your visa without delays.
Key Requirements for Visa Photos
When you need a photo for your visa, there are specific rules that you have to follow to make sure your photo gets accepted. Here are the key requirements you should know about:
1. Correct Size
- Most visa photos need to be 2 inches by 2 inches (about 51 mm x 51 mm). This size is standard for many countries, but some might have slightly different rules.
- Make sure to check the exact size needed for the country you are applying to.
2. Clear and Well-Lit
- Your face should be clearly visible. There should be no shadows on your face, and the photo should not be too dark or too bright.
- Natural lighting is best. It helps you look clear and bright without any harsh shadows or glares.
3. Neutral Expression
- You should have a neutral expression, which means no big smiles or frowning. Just keep your face relaxed, with your mouth closed and eyes open.
- Avoid looking angry or sad in the photo.
4. Plain Background
- The background should be light colored, usually white or off white. It should be plain with no patterns, shadows, or objects behind you.
- This makes your face stand out and ensures that the photo meets the rules.
5. Head Position
- Your head should be straight and centered in the photo, not tilted to the side or looking up or down.
- Your face should be visible from the top of your head to your chin, and you should be looking directly at the camera.
6. Dress Code
- You should wear normal clothing. Avoid uniforms, hats, or anything that might cover your face, like sunglasses or scarves.
- If you wear glasses, make sure there is no glare on your lenses and that your eyes are clearly visible.
7. Quality
- The photo should be high quality and in focus. It should not be blurry, pixelated, or edited too much.
- It should also be a color photo, not black and white.
Following these rules carefully helps you avoid delays or rejections in your visa application. Always check the specific requirements for the country you are applying to, as some countries may have small differences in what they need.
Best Tools for Visa Photo Editing
If you are editing your photo for a visa, you can use several tools that make the process easy and quick. Here are some of the best tools that can help you create a perfect visa photo:
1. 123PassportPhoto
- What it does: This online tool helps you create a visa photo that meets all the requirements for many countries. You can upload your photo, and it automatically crops and adjusts the size for you.
- Why its great: Its super easy to use and free. It also provides tips to make sure your photo follows the rules, like how to adjust your head position or background color.
2. Passport-Photo.online
- What it does: This is another simple tool that lets you upload your photo and edit it to meet visa photo requirements. Its great for resizing and changing the background.
- Why its great: Its free, and you do not need to install any software. Plus, it offers a step by step guide, so you know exactly what to do.
3. PhotoAiD
- What it does: PhotoAiD uses AI (artificial intelligence) to help you take the perfect visa photo. It automatically detects if your photo meets the requirements and even tells you what to fix.
- Why its great: Its fast and helps you get everything right without guessing. It works well for both online and print visa photo formats.
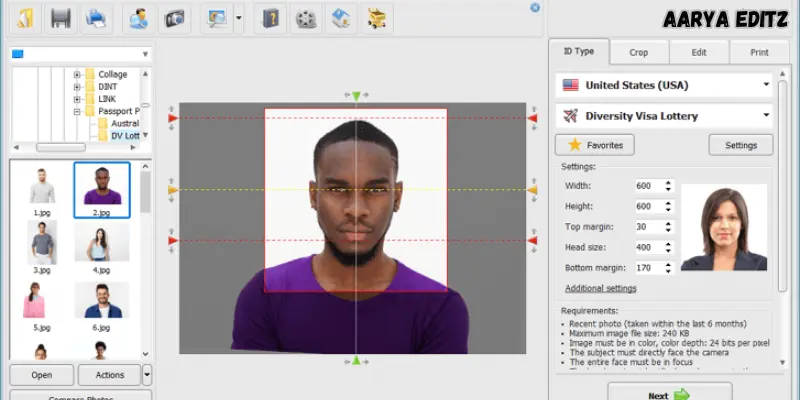
4. Adobe Photoshop Express
- What it does: Adobe Photoshop Express is a simpler version of the famous Photoshop software. You can crop, adjust brightness, and fix backgrounds in your photo.
- Why its great: Its great for people who are a bit more advanced with photo editing and want more control over their image. It also has a mobile app, so you can edit your photo on the go.
5. Canva
- What it does: Canva is a popular design tool, but it also has features for editing passport and visa photos. You can upload your photo and use the cropping tools to meet the required size and adjust the background color.
- Why its great: Its very user friendly and free to use. Canva also has lots of templates to help you get the right dimensions.
These tools make it easy to edit your visa photo, whether you are using a computer or a phone. They save you time and ensure that your photo meets all the important requirements for a smooth visa application process.
You May Also Visit
Bulb Png Picsart | Complete Guide | Aarya Editz
Photo Edit For Visa | Detail Guide | Aarya Editz
Best Lightroom Presets Free Download | Aarya Editz
Edit Love Video | Detail Guide | Aarya Editz
Advantages and Disadvantages of Photo Edit for Visa
Editing your photo for a visa is a useful way to ensure it meets all the requirements, but like everything, it has its pros and cons. Here is a breakdown to help you understand both sides.
Benefits of Photo Edit for Visa
Editing your photo for a visa can make it look perfect. It helps you follow rules, adjust lighting, and make sure everything is clear for easy approval.
| Pros |
| Ensures Compliance with Visa Requirements Meets Official Guidelines: Editing your photo helps you make sure it fits all the requirements for the visa application, like size, background color, and head position. This reduces the risk of your application being rejected due to photo errors. |
| Saves Time Avoid Delays: If your photo does not meet the requirements, it can delay your visa application. By editing your photo correctly from the start, you avoid re-submitting and waiting longer. |
| Improved Quality Clarity and Focus: Editing tools can help improve the quality of your photo, removing shadows or blurriness, and ensuring it looks clear and professional, which is essential for official documents. |
| Convenience Online Tools: Many online tools are free and easy to use, allowing you to edit your photo from the comfort of your home without needing professional help. |
| Cost-Effective No Need for a Professional Photographer: You do not always need to visit a studio to get a visa photo. With online tools, you can edit and create a visa compliant photo on your own, saving you money. |
Drawbacks of Photo Edit for Visa
Editing photos for a visa can be tempting, but it can cause problems like rejection or delays. It is important to follow the rules for a smooth process.
| Cons |
| Risk of Mistakes Incorrect Editing: If you are not familiar with the requirements or the editing tools, you might accidentally make changes that make your photo non compliant. For example, if the background is not the right color or if your face is cropped incorrectly, it could be rejected. |
| Time-Consuming for Beginners Learning Curve: For people new to photo editing, it can take some time to figure out how to use the tools properly. Even simple edits like resizing and cropping may take longer if you are unfamiliar with the software. |
| Limited Control with Online Tools Less Flexibility: Some online tools may only offer basic features, which might not give you enough control over certain aspects of your photo, like adjusting the lighting or fine tuning the background. |
| Potential for Over-Editing Too Much Editing: Some people may over edit their photo, making it look unnatural. For example, overly brightening the image or changing facial features can result in a photo that does not look like the applicant, which can be problematic during the application process. |
| Possible Extra Charges Paid Features: While many photo editing tools are free, some may offer only basic features for free and charge you for premium tools (like background removal or higher resolution downloads). This could add extra costs if you need advanced edits. |
Editing a visa photo is a great way to make sure it meets official requirements, but it is important to be cautious. Whether you use free online tools or professional software, always double check your photo to ensure it follows all the necessary rules. By doing so, you can make your visa application process much smoother and avoid delays.
Common FAQs About “Photo Edit for Visa”
Here are some frequently asked questions (FAQs) about editing photos for visas. These answers are designed to help you understand the process better and make your visa application smoother.
Why do I need to edit my photo for a visa?
You need to edit your photo to make sure it follows the rules and requirements for visa photos. This includes getting the correct size, background color, and making sure your face is clear and easily visible. Properly edited photos increase your chances of having your visa application accepted without delays.
What is the correct size for a visa photo?
The most common size for a visa photo is 2 inches by 2 inches (51 mm x 51 mm), but it may vary depending on the country you are applying to. Always check the specific requirements for the country you are visiting to make sure your photo is the right size.
Can I use a selfie for my visa photo?
No, selfies are not accepted for visa photos. Your photo should be taken with a neutral expression, with your head and eyes facing forward. A selfie usually does not meet these requirements, so it is best to have someone take a proper photo of you or use a professional service.
What should the background look like in my visa photo?
The background must be plain and light colored, usually white or off white. There should be no shadows, patterns, or objects in the background. A clean background helps make sure your face is the main focus of the photo.
Do I need to wear glasses in my visa photo?
If you wear glasses, make sure there is no glare on your lenses and that your eyes are clearly visible. Avoid wearing sunglasses or tinted glasses, as these can cause problems with identification.
How can I make sure my visa photo meets the requirements?
You can use online photo editing tools designed specifically for visa photos. These tools automatically adjust your photo to meet the size, background, and other necessary guidelines. Popular options include 123PassportPhoto, Passport Photo.online, and PhotoAiD.
Can I edit my photo too much?
It is important not to over edit your photo. Your face should look natural and clearly identifiable. Avoid using filters or making changes that alter your appearance too much, as this can lead to your visa photo being rejected.
Can I edit my visa photo using my phone?
Yes, you can edit your visa photo using apps on your phone, like Canva or Adobe Photoshop Express. These apps allow you to crop, adjust lighting, and make sure your photo is the correct size, all from your phone.
What if my visa photo gets rejected?
If your visa photo gets rejected, you will need to retake and edit your photo again, following the correct guidelines. This can cause delays in your visa application, so it is important to check the requirements carefully before submitting your photo.
Can I use a photo from my passport for my visa application?
In some cases, you may be able to use the same photo from your passport, as long as it meets the current visa photo requirements. However, some countries have specific rules, so it is best to check if your passport photo is still acceptable for visa purposes.
These FAQs will help guide you through the process of editing your photo for your visa. Always double check the specific rules for your destination country to avoid any problems with your application.
Conclusion
Editing your photo for a visa is a simple yet important step to ensure your application is accepted smoothly. By using the right tools and following the required guidelines, you can create a visa photo that meets all the necessary standards, saving you time and preventing delays.
Always check the specific photo requirements for the country you are applying to and use trusted tools to make sure your photo is the right size, background, and clarity. With the right preparation, you will be all set to submit your visa application with confidence.
Bonus Points for Editing Visa Photos
Here are a few bonus tips that can help make the visa photo editing process even smoother:
- Use the Right Lighting: Good lighting is key to a clear photo. Natural light is often the best option, but if that is not available, make sure the light source is bright and even across your face. Avoid shadows or harsh lighting that could distort your features.
- Check the Expression: A neutral expression with both eyes open is usually required. Avoid smiling too much or frowning. Your face should be natural and calm, with no extreme facial expressions.
- Correct Head Position: Ensure your head is centered and upright, facing the camera directly. The top of your head should not be cut off, and your eyes should be at the correct level within the photo frame.
- Avoid Editing Your Face: Do not use heavy filters or make changes to your facial features (like slimming down the face or adjusting skin tone). The visa authorities want to see an accurate, real representation of you.
- Review Requirements for Different Countries: Each country may have slightly different rules for visa photos. Some countries may have specific requirements for things like head coverings, facial hair, or the exact shade of the background color. Always check the visa photo specifications for the country you are applying to before submitting your photo.
By following these bonus points, you will ensure your visa photo is not only correctly formatted but also meets the strict requirements that keep your application on track.
You May Also Visit
Photo Editing Presets Download | Detail Guide | Aarya Editz
Snapseed Qr Presets | Complete Guide | Aarya Editz
Bird PNG Picsart | Complete Guide | Aarya Editz
