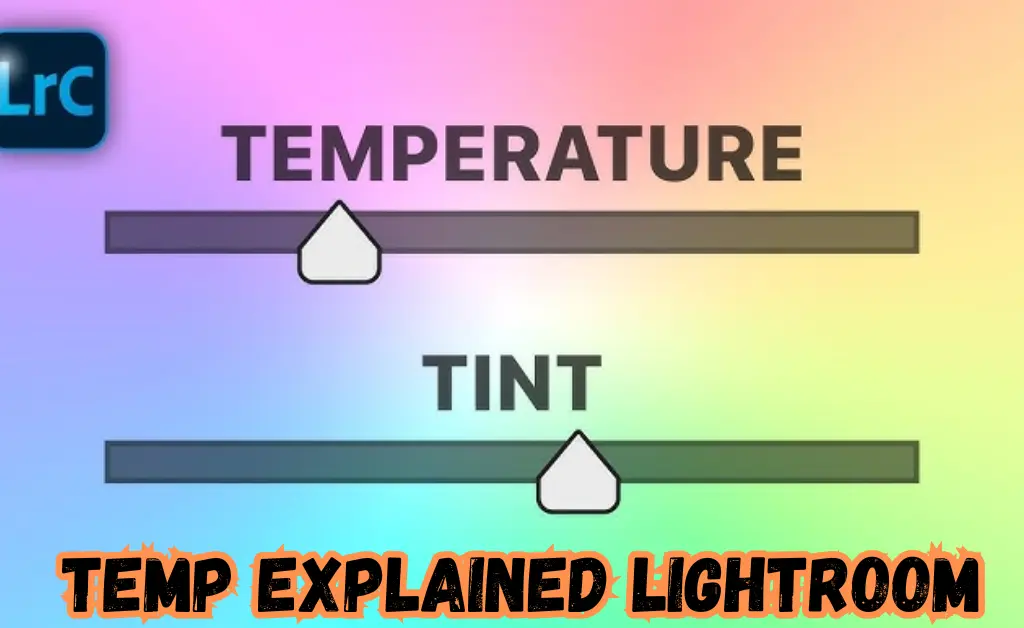
Temp Explained Lightroom. When editing any kind of photography work in Lightroom, one very powerful tool that may come in handy is changing the color temp. But what does that mean? Basically, temp in photography refers to how warm or cool the colors are in your picture. Depending on how different light sources make colors appear, natural light can really change throughout the day (too warm-yellow/orange- or too cool blue). Fortunately, Lightroom provides a very neat way for you to adjust these colors just right.
In this guide, you will track creating color casts with the temp explained lightroom, creating moods, and enhancing overall visuals. Whether you are a beginner or just improving executive skills, knowing how to adjust temp can dramatically change your outcome.
The Temp Slider in Lightroom
The temp explained lightroom is a fundamental tool found in the first row of controls in the Develop module of Lightroom, and it largely defines whether the image is warmed up or cooled down in color balance.

- Moving the slider to the left will give your photo cool blue colors, great for an overall cool or neutral look; especially useful in cases of images shot under warm artificial light, such as indoor lamps, giving you that yellow look on the picture.
- Moving the slider to the right will give warm yellow/orangish colors. Great for emphasizing the golden colors in sunsets or to warm up any image that might otherwise be too cool, such as photographs taken in the shade or on a cloudy day.
Lightroom temp explained lightroom is useful for adjusting the overall color balance of the image, thereby ensuring that the colors look natural, and the color cast is true to life. So, you can fix color casts you do not want or set the state of mind of your photo to whatever feeling you are going for by adjusting the slider.
You May Also Visit
AR Photo Editing | Complete Guide | Aarya Editz
Snapseed Background Image | Aarya Editz
Snapseed Picsart CB Background HD | Aarya Editz
Online Photo Editor Picsart | Aarya Editz
Step by Step Guide Understanding and Using the Temp Slider in Lightroom

Temp adjustments in Lightroom are one of the easiest methods to improve photos, either to remove an unpleasant color cast or to create an atmosphere for a particular effect. Here is a step by step guide to give you a better understanding of working with this important functionality:
Step 1: Open Your Image in the Develop Module
In Lightroom Develop Module, you need to open the photo you want to work upon. The Temp slider will now be visible on the right hand side, on the Basic panel, once the image has been loaded for temp adjustment.
Step 2: Find the Temp Slider
The Temp slider is located in the Basic panel with a variety of sliders pertaining to various editing controls. It is the first slider below Exposure. It adjusts the color temp explained lightroom of the image and determines whether its appearance is warm or cool.
Step 3: Understand the Actions in Both Directions
- Cooler (Left Side of the Slider): Blue tones are added when the slider is moved to the left, thus cooling the image. This is great for warming images that appear too warm or enhancing the cold, crisp feel of the shot.
- Warmer (Right Side of the Slider): Shifting the slider to the right instills yellow/orange tones into the image and thus warms it up. This is good for photographs taken under cool or neutral lighting pretty much any picture taken on an overcast day, where making it appear warmer and more inviting will prove to be effective.
Step 4: Fine Tune Temp
Begin with small adjustments to the temp explained lightroom dont make drastic adjustments right away. Instead, move the slider slightly to see what effect it has on the coloring, trying as much as possible to make the color tone appear as you see it in the original scene. For instance, if the image gives an overall feeling of too much yellow orange, consider cooling it down by moving the slider to the left. If it appears too blue-gray, warm it up by shifting the slider to the right.
Step 5: Watch Your Image
As you adjust the temp explained lightroom, observe in detail how the image color responds to each movement. The color of the image starts to appear differently, as in an image of a sunset appears even more beautiful and natural while the warmth added to that image by moving the slider to warmer adjustments, indoor artificial lighting appears cool and natural on the cooler side.
Step 6: Select Neutral with Eyedropper Tool (Optional)
If you need more precision, you can use the Eyedropper Tool available in Lightroom, which allows you to click on a truly neutral color in your image, such as a shade of white or gray. This will automatically move the Temp slider to ensure that the clicked area is neutral, balancing the rest of the image in the process.
Step 7: Fine Tuning With the Tint Slider
More often than not, after the temp explained lightroom has been used, signs of green or magenta tones may be noticed in the image. To eliminate these tones, use the Tint slider next, alongside the Temp slider; moving it to the left adds green tone; right adds magenta. It is therefore instrumental in fine tuning your white balance.
Step 8: Compare Before and After
Once adjustments have been made, take a second and check out the before and after images. You can toggle back and forth between each edited image or back to the original one by hitting the backslash key on your keyboard. If you are satisfied, continue on to further edits; if you are not, keep working until it is just right.
Step 9: Save and Export
When you are satisfied with the color temp, remember to save your work. You can now export your photo in whichever format you favor. If you have made considerable adjustments to the Temp slider, it may be useful to check for its appearance on different screens or devices in case the color balance looks bad somewhere.
You May Also Visit
Bulb Png Picsart | Complete Guide | Aarya Editz
Photo Edit For Visa | Detail Guide | Aarya Editz
Best Lightroom Presets Free Download | Aarya Editz
Edit Love Video | Detail Guide | Aarya Editz
Common FAQs About Temp Explained Lightroom
Answering the most commonly asked questions regarding Temp in Lightroom. Learn how the Temp feature affects your image and how to use it to create some creative effects with it.
1. What is the Temp slider for in Lightroom?
The Temp slider in Lewis able to adjust color temperature in your photo. It is an adjustment for warmth or coolness in the appearance of colors. Sliding it left provides cool blue tones, sliding right gives warm yellow/yellow orange tones. This is used to correct color casts arising in various illumination situations.
2. Why is my photo so warm or so cool in Lightroom?
If something in your photo appears too warm (yellow/orange), it is probably because the ambient light at the time of capture was warm. If it looks too cool (blue), then the light at the capturing time was indeed cool. The Temp slider can be moved left or right to adjust the overall color balance in the picture so that it looks natural and true to life.
3. How can I tell if my image is too warm or too cool?
Look for colors in your image. If your image appears too yellow, orange, or red, it is too warm; too blue or gray and too cool. Using the Temp slider, you can calibrate your image until the colors are balanced and look natural.
4. Can I correct my white balance using the Temp slider?
Certainly, The Temp slider is used predominantly in Lightroom white balance corrections. To eliminate unwanted yellow or blue color casts in your image, one would then proceed to slide left or right.
5. Should the Temp slider be your first point of call during editing?
It is recommended to use the Temp slider early on in the editing process, especially if there seems to be an unnatural color tone to the picture. White balance corrections will enhance the accuracies of subsequent adjustments like exposure or contrast.
6. How to make a picture warmer or cooler in Lightroom?
To make your image warm, drag the Temp slider to the right (away from Blue toward Yellow/Orange), and drag left toward blue to cool it. Make these adjustments in small increments until the colors look just right for your photo.
7. What difference is there between the Temp and Tint sliders in Lightroom?
The Temp slider changes the warmth or coolness in the image, while the Tint slider controls fine adjustments in the green or magenta tones. They act together to balance the photo overall on color issues, in which the Temp slider acts around general warmth while the Tint slider counteracts any resulting shift toward green or magenta.
8. Can the Temp slider really set the colors straight in my photo?
Though the Temp slider is a fine way to set a general color balance, it will not solve each and every problem. If the color cast in question is strong enough to resist the effects of the Temp, consider making some fine adjustments with combinations of both Temp and Tint sliders.
9. How do I work Temp slider on a sunset photo?
A sunset photo should be made warmer to really bring out that golden or red look. Move the Temp slider more right into the yellow or orange region for warmth so that it appears as a gorgeous, natural looking sunset.
10. Can I undo the changes made on the Temp slider?
Of course, If you are not pleased with what you did with the Temp slider you could always go for the Undo shortcut (Ctrl+Z on Windows or Cmd+Z on Mac). Or you may decide to just reset the Temp slider if you would like to start from scratch.
Conclusion
Adjusting the Temp slider in Lightroom is a simple but powerful way to improve your photos by correcting color balance. Whether you are warming up an image with a golden sunset or cooling down a photo taken under artificial light, this tool helps you achieve the perfect look.
By understanding how the Temp slider works, you can enhance your photos and bring out the best in every shot. Dont be afraid to experiment with it small changes can make a big difference.
You May Also Visit
Photo Editing Presets Download | Detail Guide | Aarya Editz
Snapseed Qr Presets | Complete Guide | Aarya Editz
Bird PNG Picsart | Complete Guide | Aarya Editz


