How to Export Lightroom Photos with High Resolution for Instagram: Instagram is a popular app where people share photos and videos. To make pictures look clear and sharp, the right export settings are important. When pictures are not saved correctly, they may lose quality after uploading. Adobe Lightroom helps in keeping images bright and detailed.
In this guide, you will learn how to export photos from Lightroom with the best settings. These settings will help your pictures stay high quality on Instagram.
What is “How to Export Lightroom Photos with High Resolution for Instagram”?
This means learning the best way to save photos from Adobe Lightroom so they look clear and bright on Instagram. When photos are not saved properly, they can become blurry or lose their sharpness after uploading.

Lightroom has special settings that help keep photos in high quality. By using the right export options, your pictures will stay sharp, colorful, and detailed on Instagram.
You May Also Visit
AR Photo Editing | Complete Guide | Aarya Editz
Snapseed Background Image | Aarya Editz
Snapseed Picsart CB Background HD | Aarya Editz
Online Photo Editor Picsart | Aarya Editz
Why High-Quality Export Matters for Instagram?
When you upload a photo on Instagram, the app reduces its size to save space. This can make the picture look blurry or less colorful. If you want your photos to stay clear and sharp, you need to export them in the right way.
By using the correct settings in Adobe Lightroom, your pictures will keep their bright colors and details. This helps them look better and more professional on Instagram.
Best Lightroom Export Settings for Instagram
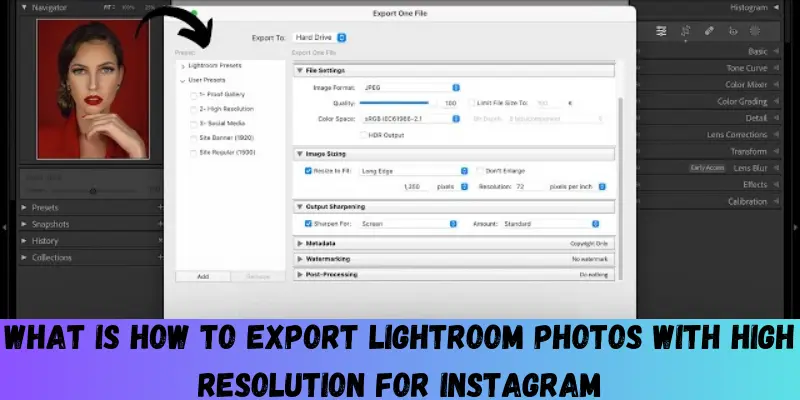
To keep your photos clear and sharp on Instagram, you need the right export settings in Adobe Lightroom. Here are the best settings:
- File Format: Save the photo as JPEG because it works best on Instagram.
- Color Space: Choose sRGB to keep colors bright.
- Quality: Set it to 100% for the best details.
- Image Size: The width should be 1080 pixels, so Instagram does not reduce the quality.
- Resolution: 72 PPI is good for Instagram.
- Sharpening: Select Sharpen for Screen to make the photo look crisp.
By using these settings, your pictures will stay clear, colorful, and high quality on Instagram.
Step-by-Step Guide to Exporting Photos from Lightroom
If you want your photos to look clear and sharp on Instagram, you need to export them correctly from Adobe Lightroom. If the wrong settings are used, the picture may lose quality after uploading. Here is an easy step-by-step guide to help you export photos with high resolution for Instagram.
Step 1: Open Adobe Lightroom and Select Your Photo
First, open Adobe Lightroom on your computer or mobile. Choose the photo that you want to export for Instagram. You can also edit the picture before exporting to make it brighter and more colorful.
Step 2: Click on the ‘Export’ Option
Once you are happy with the picture, go to the File menu (on a computer) and click on Export. If you are using Lightroom Mobile, tap the Share icon and choose Export As.
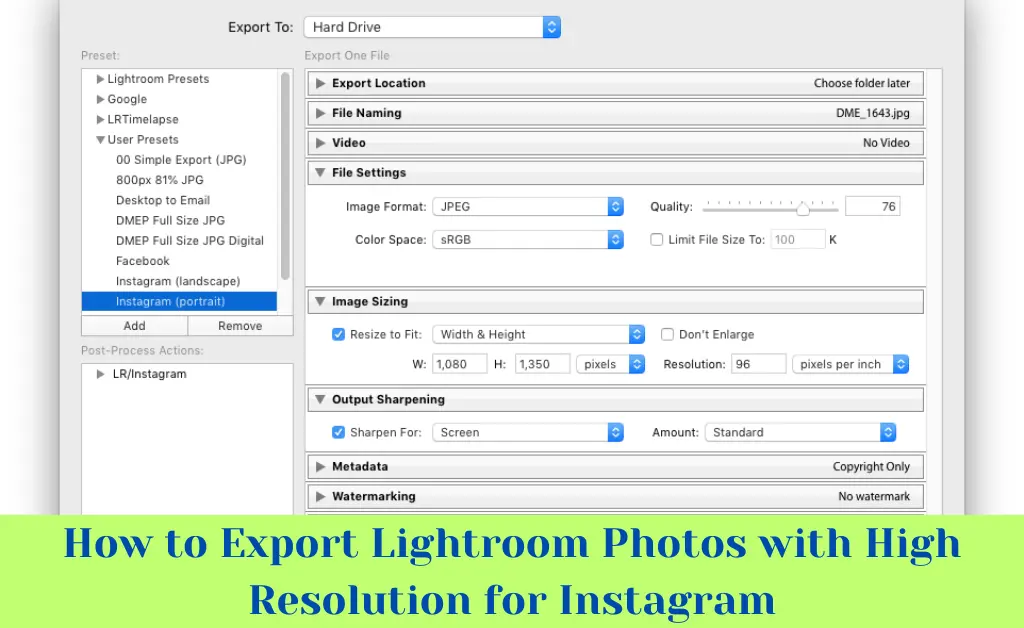
Step 3: Choose the Right Export Settings
Now, you will see different settings. Select the right options to keep your photo in high quality for Instagram.
- File Format: Choose JPEG because it works best for Instagram.
- Color Space: Select sRGB to keep the colors bright.
- Quality: Set it to 100% for the best details.
- Image Size: Set the width to 1080 pixels to match Instagram’s size.
- Resolution: 72 PPI is perfect for Instagram.
- Sharpening: Choose Sharpen for Screen to make the picture look crisp.
Step 4: Save the Exported Photo
After selecting the right settings, choose where to save the photo on your computer or phone. Click Export, and Lightroom will save the image with high resolution.
Step 5: Transfer the Photo to Your Phone
If you used a computer, you now need to send the photo to your phone. You can use:
- Email: Send the photo to your email and download it on your phone.
- Cloud Storage: Save the picture in Google Drive or Dropbox.
- USB Cable or Airdrop: Use a cable (for Android) or Airdrop (for iPhone) to transfer the image.
Step 6: Upload the Photo on Instagram
Now, open Instagram and go to the upload section. Choose your exported photo from the gallery. Before posting, you can adjust the brightness or filters to make it look even better.
Final Tips for Best Instagram Image Quality
- Do not crop your photo in Instagram: Always export in the correct size.
- Avoid over-editing: Too many filters can reduce image quality.
- Use natural lighting in photos: This helps make the picture clearer.
By following these steps, you can export high-resolution photos from Lightroom and keep them sharp.
Future for How to Export Lightroom Photos with High Resolution for Instagram
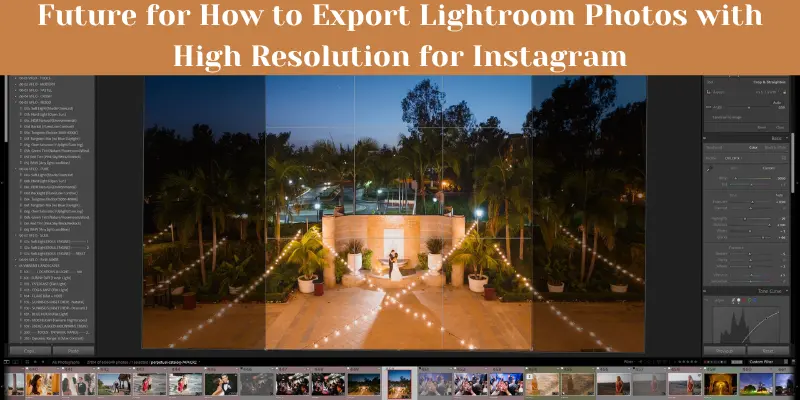
In the future, Instagram may improve how it handles image quality. Right now, Instagram compresses photos, which can make them look blurry or less sharp. But with new updates, the platform might allow higher-quality uploads without reducing image clarity.

To make sure your photos always look clear and professional, it is important to use the best export settings in Adobe Lightroom. By following the right steps, you can keep your pictures sharp, colorful, and detailed.
As technology improves, Lightroom and Instagram may introduce better tools to help users share high-resolution images easily. Until then, using the correct export settings will help keep your pictures looking their best on Instagram.
You May Also Visit
Bulb Png Picsart | Complete Guide | Aarya Editz
Photo Edit For Visa | Detail Guide | Aarya Editz
Best Lightroom Presets Free Download | Aarya Editz
Edit Love Video | Detail Guide | Aarya Editz
Advantages and Disadvantages of Exporting Lightroom Photos with High Resolution for Instagram
Exporting photos from Adobe Lightroom with high resolution helps your pictures look clear and professional on Instagram. However, there are both benefits and challenges to this process.
Benefits of Exporting Lightroom Photos with High Resolution for Instagram
Exporting Lightroom photos in high resolution makes Instagram images clear, bright, and sharp, helping them stand out and look professional.
| Pros |
| Better Image Quality: High-resolution photos look sharp, bright, and detailed on Instagram. |
| Professional Look: Clear images make your profile look more attractive, which helps grow followers. |
| More Engagement: High-quality photos get more likes, comments, and shares. |
| Best for Business and Creators: Brands and photographers need clear images to showcase their work. |
Drawbacks of Exporting Lightroom Photos with High Resolution for Instagram
Exporting high-resolution photos from Lightroom for Instagram can cause large file sizes, slower uploads, and Instagram compression, reducing image quality.
| Cons |
| Large File Size: High-resolution photos take up more storage on your phone or computer. |
| Slow Upload Speed: Big files can take longer to upload, especially with a slow internet connection. |
| Instagram Compression: Instagram still reduces the quality of uploaded images, even if they are high resolution. |
| More Editing Time: Exporting with the right settings requires extra effort and time. |
Common FAQs: How to Export Lightroom Photos with High Resolution for Instagram
Here are some common questions and simple answers to help you export high-quality photos from Adobe Lightroom to Instagram.
What is the best resolution for Instagram photos?
The best resolution is 1080 pixels (px) wide. Instagram supports:
1080 x 1080 px for square photos
1080 x 1350 px for vertical photos
1080 x 566 px for landscape photos
What file format should I use?
Use JPEG because it keeps the image clear and small in size for faster uploads.
What should be the quality setting in Lightroom?
Set the quality to 80-100% to keep the image sharp but not too large.
How can I stop Instagram from reducing image quality?
Use the correct image size (1080px width).
Export with sRGB color space in Lightroom.
Keep the file size below 1MB.
What is the best export setting for sharp Instagram photos?
Image Format: JPEG
Quality: 80-100%
Resolution: 300 DPI
Color Space: sRGB
Sharpening: Low or Standard
Why do my Instagram photos look blurry?
This happens because Instagram compresses large files. To fix this:
Export with the correct size and format.
Upload over a strong internet connection.
Avoid zooming in or cropping too much.
Can I export PNG instead of JPEG?
Instagram prefers JPEG. PNG files are bigger and may lose quality when uploaded.
Conclusion
Exporting photos from Adobe Lightroom with the right settings helps your pictures look clear and professional on Instagram. By using the correct resolution, file format, and quality settings, you can make sure your images stay sharp and bright.
Even though Instagram compresses photos, following the right steps will help you avoid blurry images. Always use JPEG format, 1080px width, sRGB color space, and 80-100% quality for the best results.
With these simple settings, you can share high-quality photos and make your Instagram profile look amazing!
Bonus Tips: How to Export Lightroom Photos with High Resolution for Instagram
Here are some extra tips to make your Instagram photos look even better!
- Use “Sharpen for Screen” in Lightroom: When exporting, select “Sharpen for Screen” to make your images look crisp and clear.
- Avoid Over-Editing: Too many filters or too much brightness can make a photo look unnatural. Keep it simple and clean.
- Try Lightroom Presets: Presets help you edit faster and keep all your photos in the same style.
- Export in 4K for Future Use: Even if Instagram resizes photos, saving a high-quality backup helps for future projects.
- Test Before Posting: Before uploading, check the photo on different devices to make sure it looks good everywhere.
You May Also Visit
Photo Editing Presets Download | Detail Guide | Aarya Editz
Snapseed Qr Presets | Complete Guide | Aarya Editz
Bird PNG Picsart | Complete Guide | Aarya Editz


