Snapseed how to use healing tool is one of the most popular photo editing apps, loved for its powerful yet easy to use tools. Among its many features, the Healing Tool stands out as a game changer for editing enthusiasts and casual users alike. This tool allows you to remove unwanted objects or distractions from your photos effortlessly, giving your images a polished and professional look.
Whether it is a blemish on a portrait, an unwanted stranger in the background, or a distracting speck of dust, the Healing Tool can fix it in just a few taps. In this guide, we shall walk you through everything you need to know about using this amazing feature in Snapseed, helping you transform your photos into masterpieces.
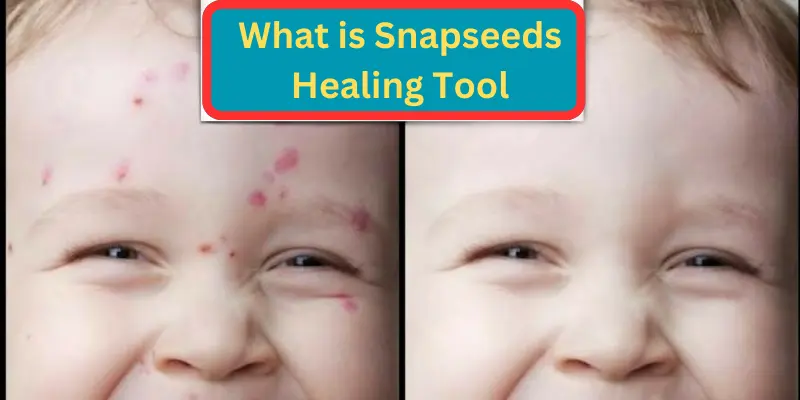
What is Snapseed How to Use Healing Tool?
Snapseed is an app that helps you edit pictures and make them look amazing. One of its coolest features is the Healing Tool. But what does it do?

Imagine you take a great photo, but there is something in it you do not want, like a piece of trash on the ground or a small mark on someone is face. The Healing Tool helps you magically erase those things so they disappear from the picture.
Its like having a magic eraser for your photos. You just tap on the thing you do not want, and Snapseed will remove it and blend the area to look like it was never there. Pretty cool, right? This tool is super easy to use, and with just a few steps, you can make your pictures look perfect.
You May Also Visit
AR Photo Editing | Complete Guide | Aarya Editz
Snapseed Background Image | Aarya Editz
Snapseed Picsart CB Background HD | Aarya Editz
Online Photo Editor Picsart | Aarya Editz
Using the Healing Tool: A Step by Step Guide
Now that you know how to access the Healing Tool, lets learn how to use it. Follow these easy steps, and you shall be a photo editing pro in no time.
Step.1 Zoom In on the Area You Want to Fix
- Use your fingers to zoom in on the part of the photo where you want to remove something. This will help you see the problem clearly.
Step.2 Select the Healing Tool
- Tap the Healing Tool (the bandage icon) if you have not already. You shall see a small circle that shows where the tool is going to work.
Step.3 Tap on the Unwanted Thing
- Gently tap on the object or mark you want to remove. For example, if there is a tiny spot on the wall, tap it with your finger.
Step.4 Watch the Magic Happen
- Snapseed will automatically remove the spot and try to match the area around it. It will blend the photo so it looks like the unwanted thing was never there.
Step.5 If Needed, Use the Undo Button
- If you do not like how it looks, you can press the Undo button (the arrow at the top) and try again.
Step.6 Zoom Out to Check Your Work
- Once you are done, zoom out to see how the edited photo looks. If everything looks perfect, you are all set.
Step.7 Save Your Edited Photo
- After you are happy with your picture, tap the checkmark to save it. You can now share your beautiful, edited photo with friends and family.
And that is it. You have just used the Healing Tool to make your photo even better.
How to Access the Healing Tool in Snapseed
Getting to the Healing Tool in Snapseed is super easy. Follow these simple steps, and you shall be ready to start fixing your photos in no time.
1. Open the Snapseed App
First, open Snapseed on your phone or tablet. If you do not have it yet, ask an adult to help you download it from the app store.
2. Choose a Photo to Edit
Tap the big + button in the middle of the screen. Then, pick a photo from your gallery that you want to edit.
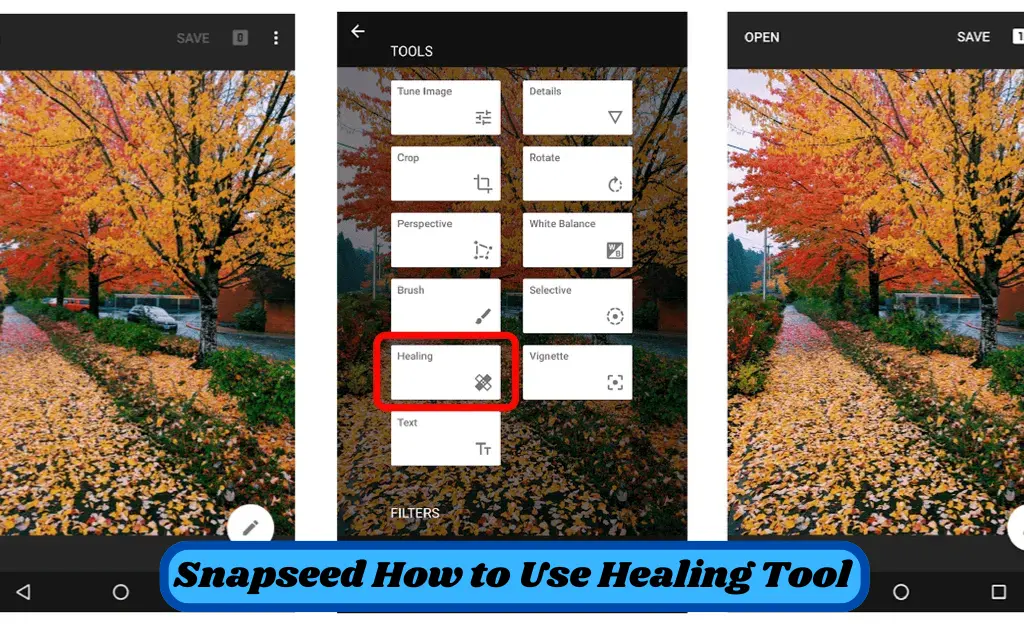
3. Go to Tools
At the bottom of the screen, you shall see a button that says Tools. Tap on it, and a lot of editing options will appear.
4. Find the Healing Tool
Look for the option called Healing. It looks like a bandage icon. Tap it, and you are ready to start editing.
That is it. Now you are all set to use the Healing Tool and make your photos look even better. It is like having magic at your fingertips.
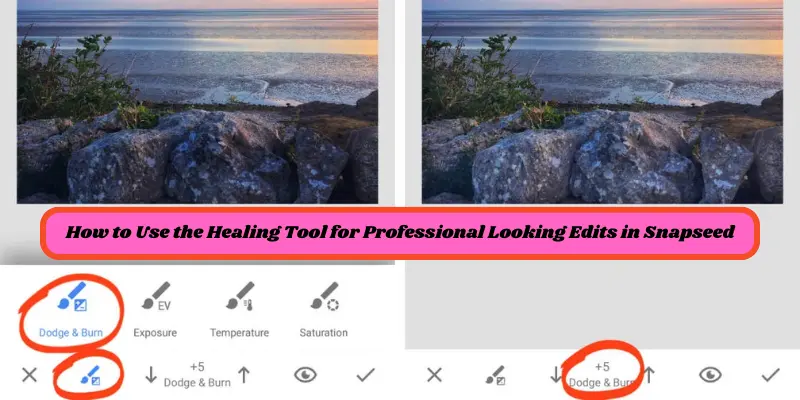
How to Use the Healing Tool for Professional Looking Edits in Snapseed
Want your pictures to look like they were edited by a pro? Using Snapseeds Healing Tool the right way can help you make amazing edits. Follow these tips to make your photos look perfect.

1. Pick the Right Photo
Choose a photo that needs small fixes, like removing a stain, a tiny scratch, or something small in the background. The Healing Tool works best when the area around what you want to remove is simple, like grass, sky, or a plain wall.
2. Zoom In for Precise Edits
Use your fingers to zoom in on the spot you want to fix. Getting closer helps you see the details and makes it easier to edit neatly.
3. Work on Small Areas
If the thing you want to remove is big, try fixing it in small sections instead of all at once. This helps the tool blend the area better with the rest of the photo.
4. Be Patient and Practice
Sometimes, it takes a few tries to get it just right. If it does not look perfect the first time, tap Undo and try again. Keep practicing it is all part of learning.
5. Use Other Tools for Final Touches
After using the Healing Tool, try Snapseeds Tune Image or Details tools to brighten up the photo or make it sharper. This adds the final touch that makes your picture look professional.
6. Check Your Work
Look at your photo closely. Does it look natural? If yes, great job. If not, you can always go back and adjust it.
By following these tips, you shall be editing like a pro in no time. Your photos will look clean, polished, and ready to share with friends and family.
You May Also Visit
Bulb Png Picsart | Complete Guide | Aarya Editz
Photo Edit For Visa | Detail Guide | Aarya Editz
Best Lightroom Presets Free Download | Aarya Editz
Edit Love Video | Detail Guide | Aarya Editz
Advantages and Disadvantages of the Healing Tool in Snapseed
The Healing tool in Snapseed helps remove unwanted objects from photos, enhancing them. Learn its benefits and challenges for better photo editing.
Benefits of the Healing Tool in Snapseed
The Healing Tool in Snapseed is a game changer for photo editing. It helps you easily remove unwanted objects or blemishes, making your images look flawless.
| Pros |
| Fixes Unwanted Things Quickly: The Healing Tool is like a magic eraser. You can remove things from your photos that you do not want, like a person in the background or a spot on someone is face. |
| Easy to Use: The tool is really simple. You do not need to be a pro at editing photos to use it. Just tap, and it does most of the work for you. |
| Makes Photos Look Cleaner: It helps make your pictures look neat and professional. No more distractions in the background. |
| Great for Small Fixes: The Healing Tool is perfect for fixing little things, like blemishes on faces, dust on the lens, or tiny marks on walls. |
Drawbacks of the Healing Tool in Snapseed
The Healing Tool in Snapseed is handy but not perfect. Learn its key downsides, from patchy edits to unnatural looks, before using it for your photos.
| Cons |
| Can not Fix Big Problems: The Healing Tool works best on small things. If there is a huge problem in the picture, it might not work as well, and you might need other tools. |
| Sometimes Makes Weird Edits: If you try to remove something tricky, like a complex background, the tool might not blend it perfectly. It might leave some strange looking spots. |
| Need to Practice: Like any tool, the Healing Tool might take some practice to use well. You might need to try a few times to get it just right. |
Common FAQs About the Healing Tool in Snapseed
Here are some of the most common questions people ask about using the Healing Tool in Snapseed. Lets answer them in a simple way.
What can I remove with the Healing Tool?
You can remove small spots, blemishes, dust, or unwanted objects in your photo. For example, you can fix a mark on someone is face or erase a piece of trash from the background.
How do I know if the Healing Tool worked well?
After you use the Healing Tool, zoom out and look at your photo. If the spot you wanted to remove is gone and the background looks smooth, then the tool worked well. If not, you can try again or use the Undo button.
Can the Healing Tool remove big objects like people or animals?
The Healing Tool is best for small fixes. If you try to remove big things like people or animals, it might not look perfect. For bigger changes, you might need to try other tools or apps.
What if the Healing Tool leaves a weird patch in my photo?
Sometimes, the Healing Tool might not blend perfectly, especially with tricky backgrounds. If that happens, you can use the Undo button and try again or zoom in more to make smaller edits.
Can I use the Healing Tool on any photo?
Yes, you can use it on any photo, but the Healing Tool works best on clear photos where the background is simple. Complex backgrounds might be harder to fix.
Do I need to pay to use the Healing Tool?
Nope, The Healing Tool is free to use in Snapseed, so you can enjoy editing your photos without any extra costs.
How do I save my edited photo?
Once you are happy with your edits, tap the checkmark to save your photo. You can then choose to share it or keep it in your gallery.
Is there a limit to how many times I can use the Healing Tool?
There is no limit. You can use the Healing Tool as many times as you need to fix your photo. Just keep tapping on the things you want to remove.
Conclusion
The Healing Tool in Snapseed is a simple and powerful way to fix small mistakes in your photos. Whether you want to remove a blemish, dust, or unwanted objects, this tool can help make your pictures look cleaner and more professional.
It is easy to use, and with a little practice, you shall be able to improve your photos in no time. So, give it a try and start editing your pictures like a pro.
Bonus Points for Using the Healing Tool in Snapseed
Here are some fun and helpful bonus tips to make your photo editing even better.
- Zoom In for Better Fixes: If the spot you want to fix is small, zoom in on it. This way, you can make the Healing Tool more accurate and get a cleaner result.
- Use the Undo Button: If you make a mistake or do not like how the edit turned out, do not worry. Just tap the Undo button (the arrow) to go back and try again.
- Tap Gently: When using the Healing Tool, try to tap gently on the spot you want to fix. If you tap too much, it might erase more than you want.
- Try Multiple Fixes: You can use the Healing Tool several times on different parts of the photo. Do not be afraid to tap again if you see something else you want to fix.
- Practice Makes Perfect: The more you practice using the Healing Tool, the better you shall get at fixing small things in your photos. So keep trying and have fun.
With these bonus points, you shall be a Snapseed editing expert in no time.
You May Also Visit
Photo Editing Presets Download | Detail Guide | Aarya Editz
Snapseed Qr Presets | Complete Guide | Aarya Editz
Bird PNG Picsart | Complete Guide | Aarya Editz


